Howdy, Stranger!
It looks like you're new here. If you want to get involved, click one of these buttons!
Quick Links
Categories
- 7.9K All Categories
- 12 Help with translations
- 4.3K General questions
- 107 Roadmap
- 360 Game & application design
- 322 Plugins
- 71 User experience
- 75 Marketplace
- 294 Code snippets
- 34 Building a team?
- 269 Suggestions & requests
- 354 Announce your apps made with Gideros.
- 91 Step by step tutorials
- 682 Bugs and issues
- 195 Introduce yourself
- 247 Announcements
- 107 Forum talk
- 405 Relax cafe
Need help with setLayoutParameters and setLayoutConstraints
As the title says I am trying to find an example or a more full fledged description of the parameters for these two methods. I read the Java reference that the documentation has, but it only talks about the constraints.
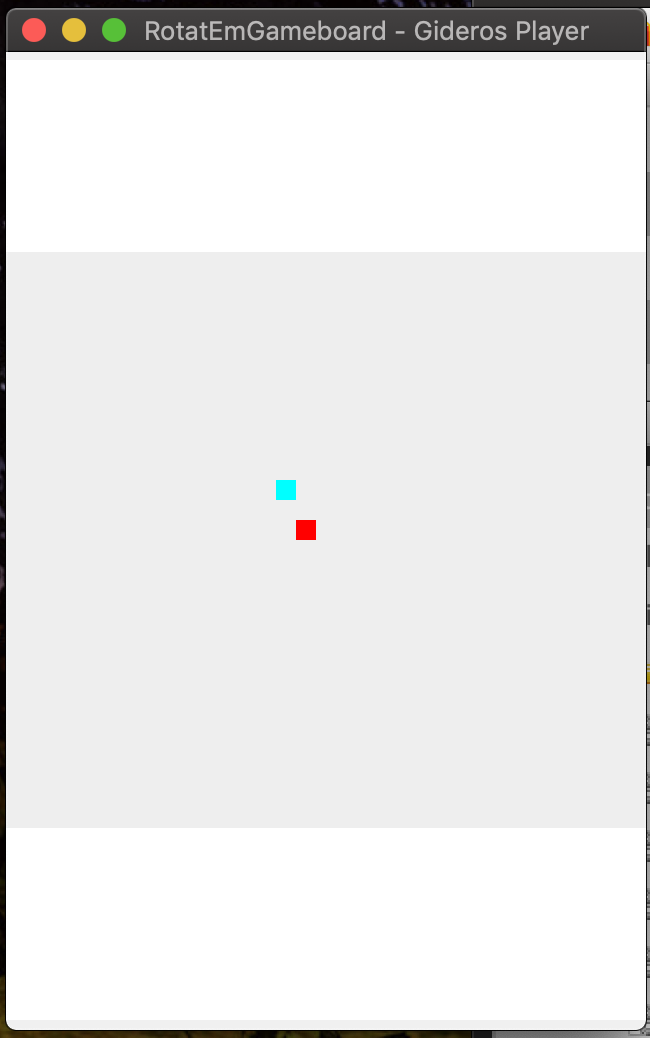
I would create a Pixel and center that on the screen and then fill that container with a set of 8 x8 images. I am sure this is probably simple but Im missing something.
To start off, I am just putting two squares on the screen just to try to understand this. The part of the code I am starting with (this is going on an empty Sprite background).
local bkGround = Pixel.new(0xEEEEEE, 1, width, height*.60)
bkGround:setPosition(0, height*.20)
bkGround:setLayoutParameters({
--columnWeights = {1,0,0},
--rowWeights = {0,0,1},
columnWidths={10, 10, 10, 10, 10},
rowHeights={10,10,10, 10, 10, 10},
})
self:addChild(bkGround)
redDot = Pixel.new(0xff0000,1)
redDot:setLayoutConstraints({
--gridwidth = 1,
--gridheight = 1,
gridx = 1,
gridy = 2,
fill=Sprite.LAYOUT_FILL_BOTH
})
bkGround:addChild(redDot)
cyanDot = Pixel.new(0x00ffff,1)
cyanDot:setLayoutConstraints({
--gridwidth = 1,
--gridheight = 1,
gridx = 0,
gridy = 0,
fill=Sprite.LAYOUT_FILL_BOTH
})
bkGround:addChild(cyanDot)


Comments
In your exemple, you create a 5x5 grid with each cell having a minimum 10x10 size. Your children have no size constraints (no minimum) so the grid will stay at its minimum size of 50x50 pixels, that is 5x5 cells of 10x10 each. That grid is centered in the parent sprite.
Likes: Apollo14
bkGroundHeight = devHeight*.65
local cellWidth = devWidth/8
local cellHeight = bkGroundHeight/8
local bkGround = Pixel.new(0xEEEEEE, 1, devWidth, bkGroundHeight)
bkGround:setPosition(0, height*.20)
bkGround:setLayoutParameters({
columnWidths={cellWidth, cellWidth, cellWidth, cellWidth, cellWidth, cellWidth, cellWidth, cellWidth},
rowHeights={cellHeight,cellHeight,cellHeight, cellHeight, cellHeight, cellHeight, cellHeight, cellHeight, cellHeight},
})
self:addChild(bkGround)
for col = 0, (side - 1) do
for row = 0, (side -1) do
local emptyDot = Pixel.new(emptyImage)
--local imageWidth, imageHeight = redDot:getDimensions()
emptyDot:setLayoutConstraints({
--minWidth = imageWidth,
--minHeight = imageHeight,
gridWidth = 1,
gridHeight = 1,
gridx = col,
gridy = row,
anchor = Sprite.LAYOUT_ANCHOR_CENTER,
fill=Sprite.LAYOUT_FILL_BOTH
})
bkGround:addChild(emptyDot)
end
end
side = 8
emptyDot = Texture.new("gfx/empty.png")
grid = Layout.new{
bgrC = 0xEEEEEE, bgrA = 0.25,
cellRelW = 1/side, cellRelH = 1/side,
--relH = 0.8,
}
for col = 0, side do
for row = 0, side do
grid:addChild(Layout.new{
col = col, row = row,
texA = 0.5, texS = 0.5,
texture = Texture.new("gfx/empty.png"),
})
end
end
gameScreen = Layout.new({
cols = 1, rows = 6,
--cellBrdW = 5, cellBrdH = 5,
cellRelH = 1/6,
--Layout.new{col = 0, row = 1, sprM = Layout.CROP, cellW = 3},
Layout.new{col = 0, row = 0, bgrC = 0xff0000, bgrA = 1},
Layout.new{grid, col = 0, row = 1, cellH = 4},
Layout.new{rotateGrid, col = 0, row = 1, cellH = 4},
Layout.new{col = 0, row = 5, bgrC = 0x0000ff, bgrA = 1},
})
stage:addChild(gameScreen)
The screen shot shows proper scale and resizes appropriately. I would think I would be able to do something similar with a Pixel box for that middle portion and then layout the dots in an 8x8 grid that will scale and resize for the device (in portrait mode)
Just set the 'scale mode' you want
Additionally, you can bind the elements to the edges of the screen using application:getLogicalBounds
https://play.google.com/store/apps/developer?id=razorback456
мій блог по гідерос https://simartinfo.blogspot.com
Слава Україні!
First change: create your images with a 0x0 size:
Likes: hgy29, MoKaLux, Apollo14